All posts by WarrenMac

Ten file sharing tips

You may be considering a move to cloud-based file sharing, or you may already be using it. Here some quick tips to help you get the most out of your cloud storage file sharing features. 

1. Set permission on your files 

File sharing made easy

Explore the capabilities of OneDrive. Store, share and collaborate on files from any device, anywhere.

Learn more about file sharing using OneDrive for business

With a file-sharing platform, you’ll want to ensure only the right people have access to your files. You should be able to restrict access to specific files or an entire folder.  

2. Check on file activity 

After you share a file, you may want to view a summary of user activity, comments, and edits for each file. You can often see a detail pane or hovercard view of your file activity by right-clicking on or hovering over a file in your cloud storage root view. You can use this view to get a quick status update on who has viewed the file, made edits or commented on it. 

3. Use password protected sharing links 

The major cloud storage providers offer robust security, such as at-rest and in-transit encryption, password-protected sharing links, virus scanning at download, ransomware protection, and two-factor authentication. Take advantage of password-protected and time-expiring sharing links. 

4. Try the shared files folder 

If you’re already using a cloud storage service, then it probably contains a “shared folder.” You’ll find all the files you’ve ever shared—and all the files shared with you in this one folder. 

5. Maintain a file naming convention 

Using consistent naming conventions and simple yet descriptive file names will help everyone with whom you are sharing files. When naming a file, consider using the keywords that others are likely to use when they search for it. 

6. Get your teammates to use the platform 

It’s no good switching to online file-sharing if the rest of your team doesn’t use it. If your coworkers are having trouble adjusting to something new, take a few minutes to show them how it works. You’ll boost their confidence and increase their participation. 

7. Classify the security level of your files 

It’s critical that you—and those with whom you share —understand the risks of mishandling essential files. It’s worth the effort to classify your sensitive data and assign an appropriate level of security to each of those files or folders. Where necessary, tightly control the access to specific files. 

8. Get the mobile app 

Download the mobile app for your cloud drive. Once you have it, you’ll be able to access, share, and edit all your files on the go. 

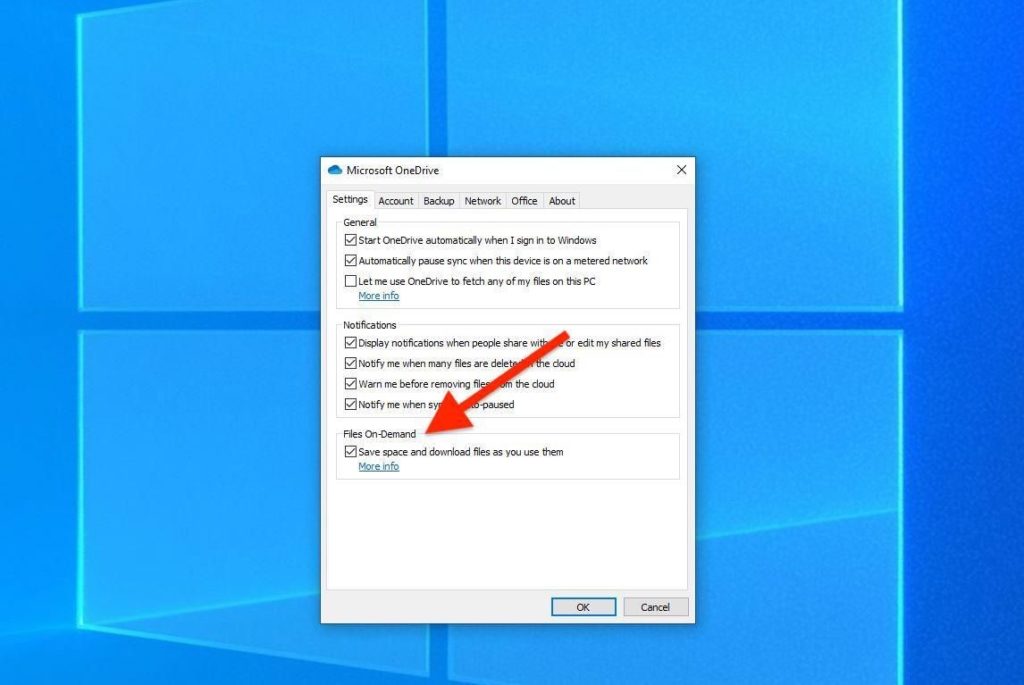
9. Set up offline access for valuable files and folders 

Typically, you can right-click on a file or folder and select it for offline access, meaning your device stores a local copy. Thus, when you are on an airplane with no wi-fi, or in a spot where your phone has no signal, you’ll still be able to access and work on your files. 

10. Set folders for automatic backup  

Turn on automatic synchronization for your important folders such as your Desktop, Document, and Pictures folders. As long as you keep all your files in these folders, you’ll never lose your work—even if you lose your device. All your work will be in the cloud and immediately accessible through the web or the app. 

If you’re new to online file-sharing, the number of options might be overwhelming. A quality cloud-based file sharing service synchronizes all of your files across all your devices and offers features that automate many aspects of sharing tasks. Eliminating much of the tedium can liberate your team to be more productive and concentrate on getting real work done.  

5 Tips to Improve Your Internet Speed at Home

5 Tips to Improve Your Internet Speed at Home

1. Test your speed

You can download broadband speed-test apps, or visit speed-test websites, to check your current broadband download and upload speeds, measured in megabits per second (Mbps).

www.speedtest.org

If your speeds are slower than expected, contact your internet service provider for troubleshooting tips and to learn if there is a nearby outage or service disruption affecting your speeds. A router reboot — power it off and turn it back on — may resolve a problem.

If those tips don’t work, you may have an equipment issue, such as an outdated router. Search the router’s model number to see if it’s capable of providing your subscribed speeds. It might need to be updated to take advantage of higher speeds. If updates aren’t available, you may need to purchase a new router or rent an upgraded router from your service provider.

2. Check your internet plan

What speed of service do you subscribe to and is it sufficient to meet new demands? FCC consumer guides on household broadband use and broadband speeds may help determine your home internet-usage needs.

3. Assess in-home connectivity

Most households with internet service use the Wi-Fi (wireless) service on a router. When many wireless devices are using the same Wi-Fi network, it can create lag, or slower responses.

Modern wireless routers often have two or more Wi-Fi signals: one in the 2.4 gigahertz (GHz) band and one in the 5 GHz band. (The higher a GHz number, the faster a processor can run and process data.)

The 2.4 GHz connections generally offer broader coverage, but they process data less quickly than 5 GHz connections. And 2.4 GHz is also the frequency on which many household devices and most Wi-Fi routers operate. If you see a list of other Wi-Fi networks available in your router’s Wi-Fi settings, your performance could be impacted by those neighboring networks.

Routers that use a 5 GHz connection are faster, but their signal covers a shorter range than 2.4 GHz bands. In addition to faster speeds, the 5 GHz band may be less crowded by neighboring Wi-Fi networks and offer more stable connections.

Quick tip: A direct ethernet cable connection between your router and a device that accesses the Internet—such as a cord connecting your laptop and router—will provide the highest speeds.

Consider dedicating the 5 GHz network on your router to your most important uses, such as telework or school work. Change the password or manage the devices that access your Wi-Fi network to keep nonessential devices from connecting. For more advanced network partition options, consult your router’s manual. To maximize Wi-Fi coverage in your home, place the router in a central location. A Wi-Fi range extender or a system of mesh network routers also can improve Wi-Fi signal strength throughout your home.

A direct ethernet cable connection between your router and a device that accesses the Internet — such as a cord connecting your laptop and router — will provide the highest speeds and alleviate Wi-Fi congestion issues. If your laptop (or other Internet device such as a streaming TV or gaming system) does not have an ethernet port, consider using a USB ethernet adapter.

Good Router

Best Router

4. Set up a schedule

Even the latest Wi-Fi routers with fast service speeds can get bogged down by a family trying to do multiple things at once: stream video, play graphics-intensive games, use virtual private networks (VPNs) and video conference. Set guidelines with your family and discuss daily schedules to prioritize usage and avoid performance issues. If your job offers flexible hours, you may be able to work around high-traffic times on your home network.

Quick tip: Another way to alleviate home Wi-Fi network congestion is to disconnect your cellular devices from your Wi-Fi network.

5. Explore your options

If you get a good cellular signal in your home, another way to alleviate home Wi-Fi network congestion is to disconnect your cellular devices from your Wi-Fi network. You may be able to use your cellular device as a mobile hot spot, through which you can connect noncellular devices, such as a laptop, to your cellular service.

But before switching any of your devices to cellular-only service, check your cellular data plan to make sure you won’t exceed data caps and incur overage charges. You also can explore options for fixed wireless service or other cellular alternatives in your area.

Quick tip: Set guidelines with your family and discuss daily schedules to prioritize usage of computer devices. and avoid performance issues.

If you’re not seeing congestion on your in-home Wi-Fi network, turning on Wi-Fi and Wi-Fi calling from your smartphone can conserve data and reduce potential congestion on mobile networks. It can also help prevent data overage charges on your mobile phone plan.

Many service providers have committed to providing free Wi-Fi hot spots during the pandemic. Some are offering discounts or temporary upgrades at low or no cost, or eliminating caps on data plans. Learn more about what carriers are doing to support their customers.

If you need help settting up  your Wireless Network I have the tools and skills

8 quick ways to free up drive space in Windows 10

Account             McKenna Computing Services


8 quick ways to free up drive space in Windows 10

Bumping up against your PC’s physical storage limit? Here’s how to grab a couple gigs’ worth of space.

No matter how large a hard drive or solid-state drive you have in your PC or laptop, there will come a time when you run out of space. If you’re bumping up against your PC’s physical storage limit, here are some quick tricks you can use to reclaim a couple of gigabytes’ worth of storage space. These options will take you only so far; if you need more free space after following these tips, you may need to add a second hard drive or replace your current drive with one with more storage capacity. 

With that caveat, here are eight tips for reclaiming some drive space on your Windows PC or laptop.

Empty the Recycle Bin

When you delete items, like files and photos, from your PC, they don’t immediately get deleted. Instead, they sit in the Recycle Bin and continue to take up valuable hard-drive space. To empty the Recycle Bin, go to your desktop, right-click on the Recycle Bin and click Empty Recycle Bin. You will see a warning pop-up asking if you are sure you want to permanently delete your Recycle Bin items. Click Yes to proceed.

Disk Cleanup

Windows has a built-in disk cleanup utility, aptly named Disk Cleanup, which can help you clear up space by removing various files — including temporary internet files, system error memory dump files and even previous Windows installations that may still be hanging around.

Delete temporary and downloaded files

You can delete temporary files without running Disk Cleanup, along with files you downloaded that you may no longer need. Go to Settings > System and click on Storage on the left panel. Next, click Temporary files from the list that shows you how your storage is being used on the C: drive and check the boxes for the type of temp files you want to jettison before clicking the Remove files button to delete them.

Turn on Storage Sense

You can automate some of this cleanup by heading back to the Storage page in Settings and toggling on Storage Sense. You can set it so Windows automatically deletes unused temporary files, as well as files that have been in the Recycle Bin and Downloads folder for more than a day or up to 60 days. You can also choose to move local files off your PC and to the cloud via OneDrive if they haven’t been opened for a specified period of time. I’m pretty good about emptying the Recycle Bin on something approaching a regular schedule, but I’m also very happy to have Windows track down and eradicate needless temp files and old downloads.

Save files to a different drive

If your computer has multiple hard drives or a partitioned hard drive, you may find yourself running out of space on one drive (or partition). Luckily, you can fix this by changing your default save locations for apps, documents, music, pictures and videos. To do this, open the Settings menu and go to System > Storage and click the link at the bottom for Change where new content is saved. You can select a partition or a drive — even a removable drive, like a USB flash drive or a memory card — that is connected to your PC to save files for categories including apps, documents, music, photos and movies.

Disable hibernate

Instead of shutting down your computer completely, you can put it in hibernate, a quasi-shut-down state that allows the computer to start up faster. When your computer goes into hibernate, it saves a snapshot of your files and drivers before shutting down, and this takes up space. If starting up quickly isn’t your priority, you can reclaim some valuable hard drive space by disabling hibernate altogether, because the hiberfil.sys file can take up gigs of drive space.

Click the Start button and search for Command Prompt. Right-click Command Prompt at the top of the search results and select Run as administrator. In the Command Prompt window, enter: powercfg /hibernate off and then hit Enter. (If you miss hibernating, you can use command: powercfg /hibernate to re-enable the feature.)

Uninstall apps

You probably have some apps and programs on your PC that you don’t use — either apps you’ve installed and forgotten about, or bloatware that came preinstalled on your computer from the manufacturer. To find out which apps are taking up space, open the Settings menu and go to Apps > Apps & features and choose Sort by size. To uninstall an app from this menu, click the app and then click Uninstall.

If you’re running legacy programs on Windows 10 ($170 at Best Buy), you may not see them in this list (some appear, but some do not). To find these, open Control Panel by searching for it from the Start menu. Under Programs, click Uninstall a program to see a list of the legacy programs on your computer (you can also sort this list by program size). To uninstall a program from this list, left-click it to select it and click the Uninstall button at the top of the list.

Store files in the cloud — and only in the cloud

If you take advantage of cloud storage via OneDrive or another service, you’re probably double-storing files and photos. Well, you don’t have to do this — all cloud storage services allow you to select which folders are downloaded and saved to your PC (as well as in the cloud).

If you use OneDrive, here’s what to do: Right-click on the OneDrive icon in your system tray and choose Settings. In the Settings tab, check the box for Save space and download files as you use them. This setting will let you see the files you have stored in OneDrive from File Explorer on your PC, which pulls off the neat trick of showing you all of your local and cloud-based files in one spot. In File Explorer, you’ll see three different icons for OneDrive files in the Status column:

  • Blue cloud: online-only file
  • Green checkmark in white circle: locally stored file that might revert back to online when you run short on space
  • White checkmark in green circle: locally stored file that will stay put, no matter how short on space you get

You can easily move OneDrive folders and files to your PC and back again. To move a file or folder stored in OneDrive to your PC, right-click it and select Always keep on this device. To remove the local copy of the file or folder and have it stored only on OneDrive, right-click it and choose Free up space.

LIGHTING, POSITIONING AND OTHER TIPS FOR YOUR ONLINE CALLS

Some lighting, positioning and other tips for looking your best and more professional during an online call or meeting.

Webcam 1080P Streaming Web Camera with Noise Cancelling Microphone, Skype Web Cam Full HD for PC Laptop Computer, USB Plug Play for Windows 10/8 / 7 Mac OS X, Wide Angle Autofocus

Where to put the camera

The camera should be about the same level at the top of your head then tilted down a little to your eyes.

In other words, have the camera looking down to you, just a little.  Not looking up from below.

A pile of books a la Prince Charles or a collection of DVD box sets (for those of us with Kindle’s

Lighting

If you have the choice, a lamp behind and to one side of the camera is best.

Try to avoid glaring lights behind you that will ‘flare’ in the camera.

Lampat LED Desk Lamp, Dimmable LED Table Lamp Black, 4 Lighting Modes, 5-Level Dimmer, Touch-Sensitive Control Panel, 1-Hour Auto Timer, 5V/2A USB Charging Port)

Any light will do but a modern LED lamp with multi-color selection gives you some options for white, ‘warm’ or yellow-ish white or a ‘cool’ white with a hint of blue. Most also have dimming/brightness options.

lighting positioning and other tips for your online calls microsoft teams 36461 - Lighting, positioning and other tips for your online calls

It might be tempting to use the flash on a smartphone but they are intended for short bursts not long time use more than a few minutes.

If you can’t change the lighting, use a Virtual Background (Zoom) or a Snapcam filter to block out the background.

Even lighting will get better results with Virtual Background and other video effects.

Fill and Bounce

If you’ve ever seen a professional filming or still photo session, you’ll have noticed it’s not all direct lighting.  There’s usually indirect lighting with mirrors or special reflectors.

lighting positioning and other tips for your online calls microsoft office 36453 - Lighting, positioning and other tips for your online calls

The reflector gives a more even light across the whole face. There are fancy reflectors available but you don’t need one.

All you need is a piece of paper!

Piece of white paper

Put some white paper, flat on the surface in front of you so that light reflects up to your face.

Hair and Makeup

No need to look glamorous but do your hair. Gentlemen, please shave.

The aim is to avoid distractions. Nothing that takes attention away from what you’re saying.

Zoom’s preview option lets you check yourself in a virtual mirror before joining a call.

Themed calls

For regular calls with friends or workmates, why not have a ‘themed’ online meeting.

Maybe ‘Bad T-shirt’ or ‘Favorite T-shirt’.

Or ‘Glam’, ‘Prom’ or ‘Formal’ where everyone gets dressed up.

clever tricks with zoom microsoft powerpoint 36180 - Lighting, positioning and other tips for your online calls

Watch out that you don’t blend into a virtual background!

Work and learn from anywhere solutions

Work from anywhere bundles


Essentials

Essentials working bundle


Includes:

Dell XPS 15 laptop 15.6″, 4K UHD InfinityEdge Touch, 9th Gen Intel Core i7-9750H, NVIDIA GeForce GTX 1650 4GB GDDR5, 1TB SSD storage, 16GB RAM, XPS7590-7565SLV-PUS

WD 2TB My Passport Ultra Blue Portable External Hard Drive, USB-C – WDBC3C0020BBL-WESN

VXi BlueParrott 204123 B250-XT-USB 89% Noise Canceling Bluetooth Headset (Renewed)
Productivity bundle

Productivity working bundle


Includes:

Professional Bundle

Professional working bundle


Includes:

Microsoft Windows 10

Microsoft said Wednesday that its new Windows 10 software is running on more than 75 million computers, tablets and other devices — in just under a month since the operating system was released. Read More….


Contact McKenna Computing Services if you have any questions or need help with an installation of Windows 10.

Kindle Paperwhite

Highest resolution e-reader display

New—With twice as many pixels as the previous generation, the all-new Kindle Paperwhite has an improved high-resolution 300 ppi display for crisp, laser quality text. No other e-reader offers a higher resolution display.